AIY: Google Assistant Upgrades - May 2017

Like what you see here? Have kids? You may want to check out my STEM series
of posts where I am introducing our children to STEM (Science Technology
Engineering and Math) at early ages - and they are loving it.
http://eduncan911.com/stem

Google and the community have jumped in with both feet with the AIY Projects release and the Voice HAT kit from MagPi, submitting dozens of PRs and updates to both the Google Assistant SDK and Voice Recognizer projects.

In addition, the Google Assistant SDK has been updated to support:

  • Hot Words detection to activate with “Ok Google” or “Hey Google”, along with the AIY Projects update to support it.
  • Alarms and Timers: “Hey Google, set a time for 10 minutes.”

Before we get started, a quick refresher for those new to the projects.

What is Google AIY?

Google has jumped into the A.I. World of Amazon’s Alexa and IBM’s Watson with their own version called the Google Assistant. The difference being Google brings strong search, wide integration and an open SDK.

Google AIYProjects for Raspberry Pi: Voice Kit

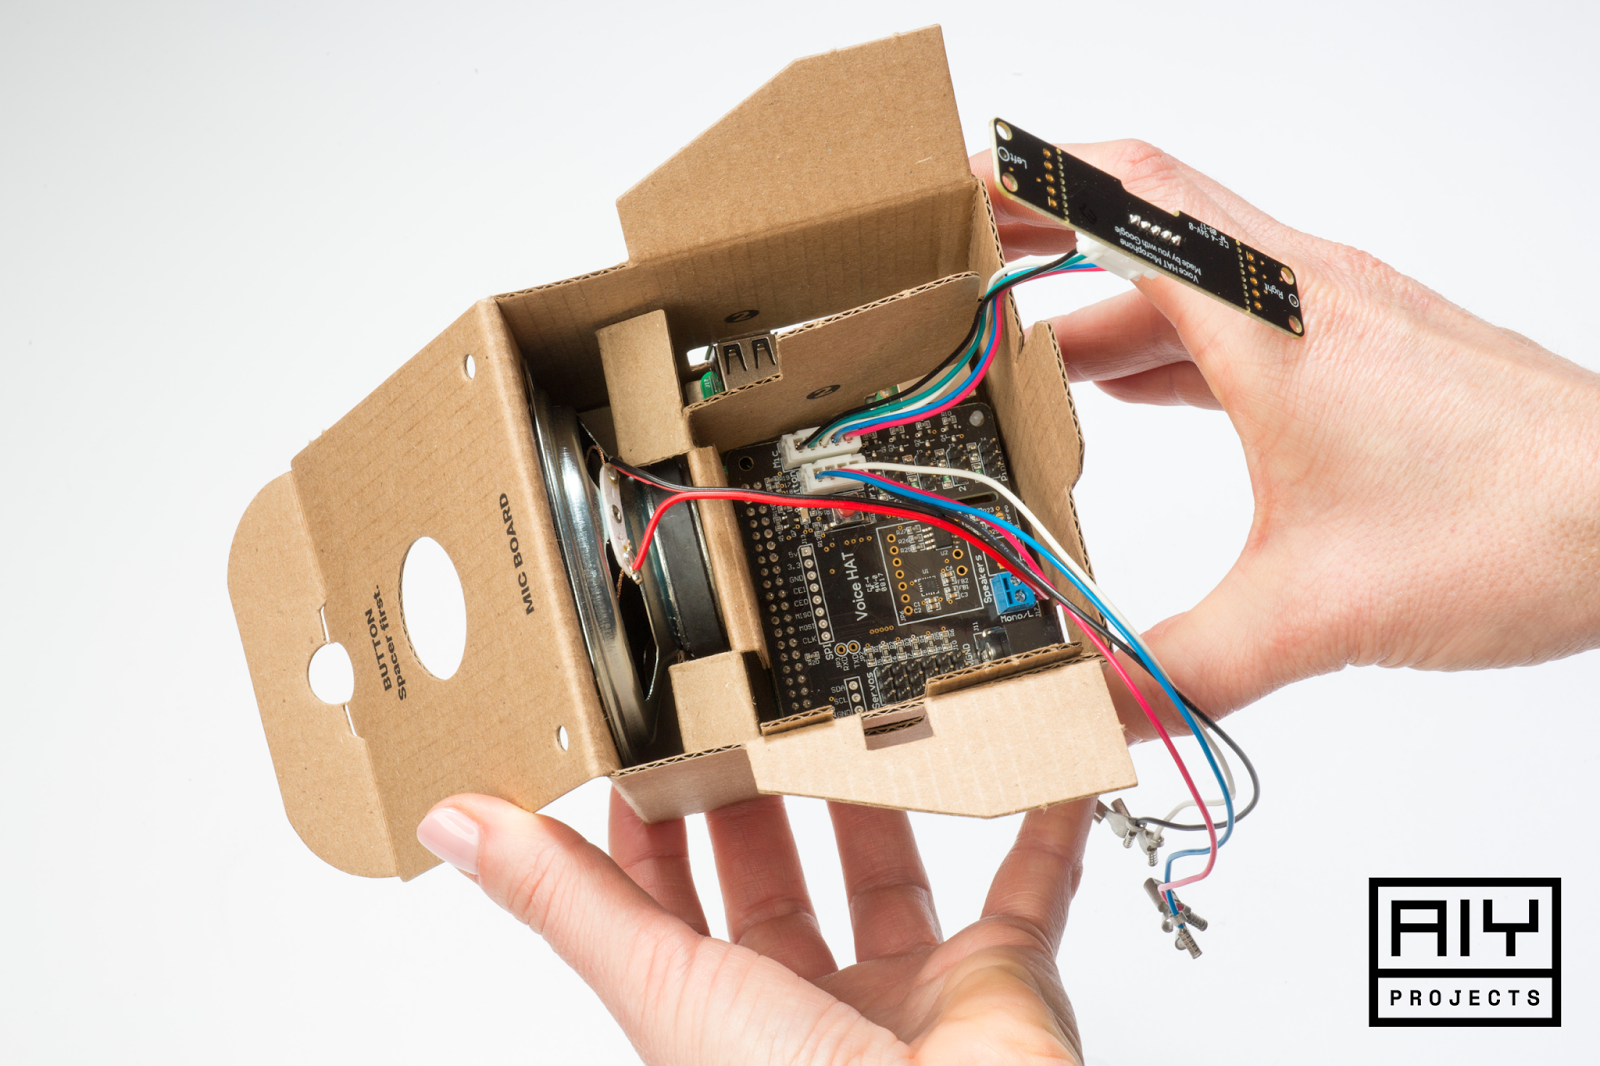
Google and the magazine MagPi teamed up to produce a simple AIY project called the Voice Kit, which is cardboard cube that houses a Raspberry Pi and a number of components. What’s even more cool is everything that was included with the kit, which came free with the MagPi magazine!

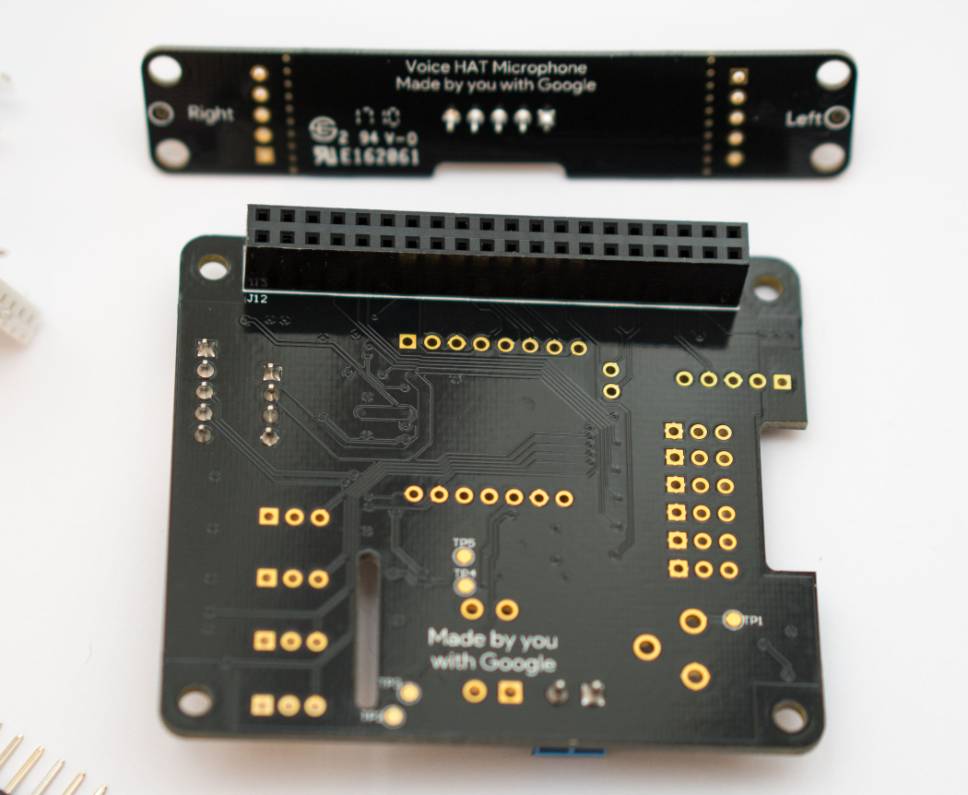
  • Voice HAT
  • Dual-Microphone Board
  • Speaker
  • Arcade Button complete with matching Lamp Holder, LED and inline resistor – and the resistor was even soldered inline already.
  • Quick disconnects soldered onto everything

The only things required was a Raspberry Pi (I used a Pi 3), a power adapter and a microSD card – standard things you should have laying around if your are a Pi guru.

Voice HAT
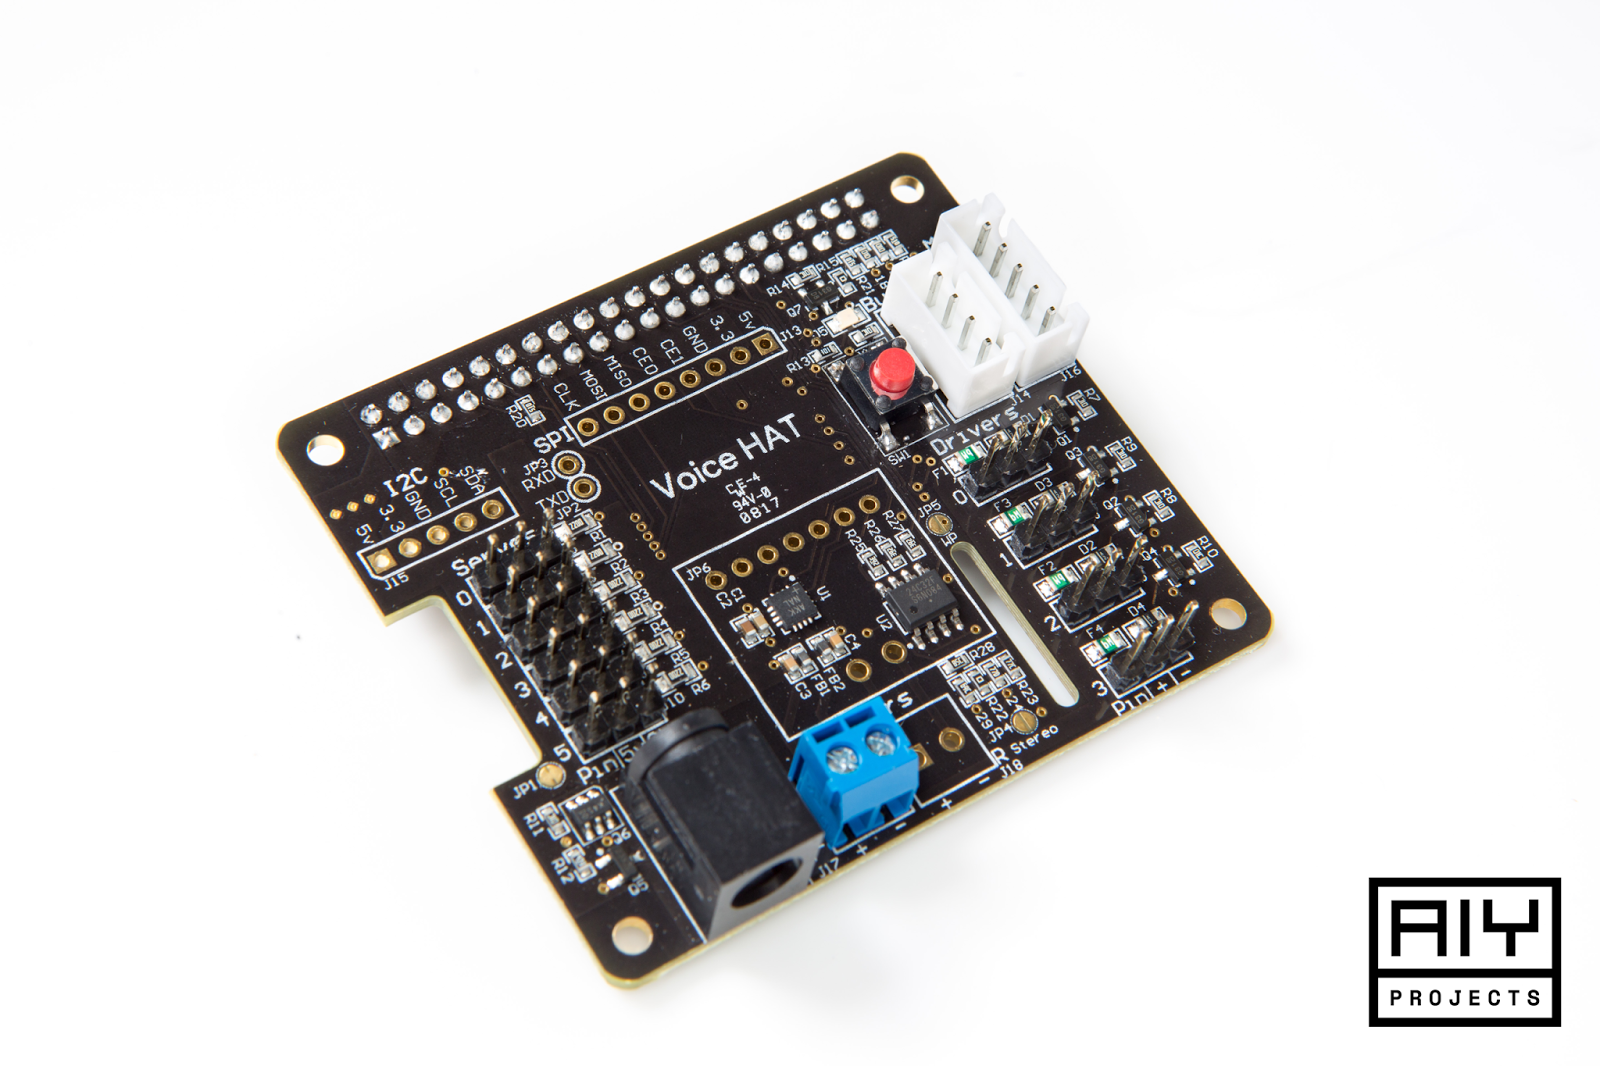
HAT stands for Hardware Attached on Top, which are devices you simply attach directly to your device.

The Voice HAT that is included with the Voice Kit, part of the AIY Projects noted above, is impressive that it was free. It has several GPIOs available on it, along with several soldered on connectors. Hardcore Raspberry Pi gurus have balked, “come on, a button and LED?” But really, Google is targeting a younger audience with these components to make it an easier barrier of entry into the world of embedded devices.

Essentially, this Voice HAT makes it really easy for anyone to get involved. If only the SDKs and code were as simple (see upgrading below).

Google Assistant SDK

Google released a new SDK recently called the Google Assistant SDK. The tag line reads:

Bring hotword detection, voice control, natural language understanding, Google’s smarts, and more to your devices.

Currently the only SDK available seems to be Python, and only for Raspberry Pi. But Google has said they are committed to supporting several mainstream hardwares and other languages in the future.

Upgrading your AIY Project

Now back to the updates for May 2017.

If you want to be on the bleeding edge to enable these updates, be
aware that pulling down the latest source code from the master branch is risky.
It can break the entire setup, forcing you to reinstall everything from scratch.
I have noticed the devs adding c.i. travis, coverage and tests, which really
helps stabilize it. But be aware, something could still slip through.

These are the instructions as of late May 2017.

So far, here’s what we’ll be doing:

  • Update Google Assistant SDK in ~/assistant-sdk-python
  • Update AIY Project for Raspberry Pi in ~/voice-recognizer-raspi
  • Fixing Python dependencies
  • Setting the Voice Kit to auto-start.

Here’s all the scripts in one go. Log into your Raspberry Pi, or use the Start Dev Terminal from the desktop:

# UPDATE GOOGLE ASSISTANT SDK
cd ~/assistant-sdk-python
git checkout master
git pull origin master

# UPDATE VOICE RECOGNIZER (AKA: AIY PROJECTS)
cd ~/voice-recognizer-raspi
git checkout master
git pull origin master

# UPDATE DEPENDENCIES
cd ~/voice-recognizer-raspi 
rm -rf env      # needs to be rm'd w/current version of install-deps.sh
scripts/install-deps.sh

As long as you did not modify any of the files, those should have ran smoothly. If you, like me, were tinkering with the src/main.py and got a conflict, erase the changes by using git checkout <file> (make a backup if you want first with cp <file> <file>~).

At this point, you should be able to test everything is working:

sudo systemctl stop voice-recognizer.service    # if you had it running
cd ~/voice-recognizer-raspi
source env/bin/activate
src/main.py 

See if you got the latest SDK by testing the “Timer” functionality:

> "set a timer for 10 seconds"
< "You got it, setting a timer for 10 seconds. Starting now."

“OK Google” needs a bit more configuration, see below.

“Pi reboot” and “Pi Power Off” needs some tweaking. I’ve opened an issue suggesting we change the leading word “Pi” to something else, because it isn’t detected very well. It’s been changed to “Raspberry Reboot” and “Raspberry Power Off.”

Review the new Config Files

There’s been a lot of movement lately. You may want to backup your existing config file and bring over the newest versions, then re-implement your configurations.

# back them up first
cp ~/.config/status-led.ini ~/.config/status-led.ini~
cp ~/.config/voice-recognizer.ini ~/.config/voice-recognizer.ini~

# copy the new ones over
cp ~/voice-recognizer-raspi/config/status-led.ini.default ~/.config/status-led.ini
cp ~/voice-recognizer-raspi/config/voice-recognizer.ini.default ~/.config/voice-recognizer.ini

# open and review the new options
nano ~/.config/voice-recognizer.ini

You’ll notice the new “ok-google” trigger as well as the trigger sound and more.

If you want this automated in the future, add a rm ~/.config/voice-recognizer.ini to the upgrade steps before running the scripts/install-deps.sh file – as this file actually copies over the latest config files, if they don’t exist.

Enabling “OK Google” and “Hey Google” Hot Words

This process is preferred over the manual method talked about in Raspberry Pi forums. For one, it won’t break your installation by modifying files that will create a conflict if you update the repository to the latest.

There is a pending pull-request to do exactly this. Considering the current velocity of the repo, I’d say wait a few more days and then just update per instructions above.

Once PR #64 is merged into master, you can switch the trigger to use the hot words. So keep monitoring that PR and when you see the purple tag say “MERGED”, follow the instructions above again to git pull the latest and newest dependencies.
It’s all merged now! Though, it only supports ARMv7 and newer (sorry Pi Zeros and Pi Ws).

After performing all the upgrades above, test the new trigger:

sudo systemctl stop voice-recognizer.service    # if you had it running
cd ~/voice-recognizer-raspi 
source env/bin/activate
src/main.py --trigger="ok-google"

If you want this to stick, to be persisted for the auto-start services, edit the voice-recognizer.ini file as per the original setup docs:

nano ~/.config/voice-recognizer.ini

And make the trigger say “ok-google”:

# Select the trigger: gpio (default), clap, ok-google.
trigger = ok-google

You can only have one trigger with the current project at this time. Feel free to submit a pull request to enable multiple triggers.

Press CTRL-X and Y to save. Then restart the service:

sudo systemctl restart voice-recognizer.service 

Now, speaking “OK Google” or “Hey Google” should work.

Try having a conversation with “Hey Google” to confirm the SDK continues your follow up questions:

> "Hey Google, how far away is Japan?"
< "Japan is 6,000 miles away as way of the crow flies."
> "Hey Google, and from California?"
< "Japan is 5,000 miles away from California"

Notice how the SDK remembered you previously searched for the distance of Japan? This was a feature that Google announced back in 2015, contextually aware searches of continued searches. And it has been brought over to the Assistant SDK.

Try the Trivia Game for a long extensive test of the conversation feature:

> "Hey Google, let's play trivia!"

I didn’t know wolverines could climb trees.

Setting to Auto-Start on Reboot/Power On

If you want it running all the time to let the family play Trivia every morning, set your services to start on boot:

# UPDATE AUTO-START SERVICES ON BOOT (optional)
cd ~/voice-recognizer-raspi 
sudo scripts/install-services.sh 
sudo systemctl start status-led.service 
sudo systemctl start status-monitor.service
sudo systemctl start voice-recognizer.service 
sudo reboot

Wait about 30 seconds and see if the button starts flashing again.

Summary

You gotta love Google’s Cardboard VR gimmick when they came out. People were paying $1000 for VR headsets, and here’s Google with a $15 kit to do the same. Sure, the experience is better on the $1000 kits (I myself have spent a lot of time with the HTC Vive). But there’s something about going back to that cardboard clip on that makes you feel like Google enjoys shaking up industries.

And here we are, with Google jumping into the A.I. devices with a bottom-dollar hackable entry that anyone with a few bucks can run out and pick up.

Though, updating it, especially for non-Python gurus, is a PITA and subscribes most people who can only enjoy this to a very small niche of developers, who happen to know Python and git.

Feel free to reach out in the comments for help.

Troubleshooting: Missing Dependencies

Hopefully by the time you read this and try to implement the changes, they will have fixed all the missing dependencies. If not, continue below for some hints on how to fix them.

Activate virtualenv “env”

Remember to activate your env/bin/activate before doing any of this, to keep it in the same virtualenv.

cd ~/voice-recognizer-raspi
source env/bin/activate 

This keeps everything installed in the original location that the install-deps.sh file put them. Don’t worry, it’s a Python thing.

Google Assistant SDK manual install

I had to install the latest SDK to get the hot word detection fixed working in the initial testing of the branch by drigz:

pip install --upgrade https://github.com/googlesamples/assistant-sdk-python/releases/download/0.3.0/google_assistant_library-0.0.2-py2.py3-none-linux_armv7l.whl

That was 2 days ago. As of now, it is part of pypi (part of the normal dependency chain). So it should be fixed and you shouldn’t have to do this.

ImportErrors

You may eventually see some import errors like this:

$ cd ~/voice-recognizer-raspi 
$ source env/bin/activate
$ src/main.py
Traceback (most recent call last):
  File "src/main.py", line 32, in <module>
    import tts
  File "/home/pi/voice-recognizer-raspi/src/tts.py", line 24, in <module>
    import numpy as np
ImportError: No module named 'numpy'

Running the dependency chain that Google supplies should be the first step.

cd ~/voice-recognizer-raspi 
scripts/install-deps.sh

If you continue to see import errors, than try to install them. They seem to be good at picking very reliable dependencies.

pip install <module-name-from-the-ImportError>

For example:

$ pip install numpy
Collecting numpy
  Downloading numpy-1.12.1.zip (4.8MB)
    100% |████████████████████████████████| 4.8MB 60kB/s
Building wheels for collected packages: numpy
  Running setup.py bdist_wheel for numpy ... -
done

NOTE: Numpy takes like 20 minutes to compile on a Pi3. You’ll have to sit and wait.

Hopefully that continues to fix up the missing deps.
Leave a comment

How to Enable Bash on Windows 10 Preview

Today I am going to outline how you can install and use the Linux User Mode (UML) in Windows 10 based on the new Windows Subsystem for Linux (WSL) that was announced at Windows Build 2016.

Why Bother? OS X works fine.

I am writing this jamming away on my Macbook Pro 15” connected to three external 1080p 120 Hz 3D monitors, my precision mouse and CODE mechanical keyboard. Once running ArchLinux for over a year, I’ve recently went back to OS X purely for the user experience. I miss my Arch installs; but, I don’t miss the annoyances around docking/undocking my tri-monitor setup and switching from HiDPI and my 1080p monitors. It was a painful experience when disconnecting and reconnecting.

I also ran Windows 10 natively on it for a few months as I got annoyed at VMware crashing Arch all the time. I was doing my C# Mono work in my Linux VM anyways and not natively on Windows. Battery life sucked with the VM though.

OS X just nails HiDPI perfectly when docking and undocking, switching primary monitors, etc.

No. The real reason I am interested in Linux on Windows is:

  • Going back to Desktop Development

I have a 4.8 Ghz hex-core, 5300+ GPU core gaming beast of a machine (also connected to those same 3 monitors) just sitting idle, unused for months. ArchLinux natively on that Asus motherboard was ok; but, I miss my Windows games and no longer could control my TEC waterchiller (it was Windows software I wrote for it).

All Windows was missing was my GNU Linux tooling. I spent the better part of a week replacing all OS X versions of the tools (sed, ack, grep, etc) with the real GNU versions. OS X has Homebrew; Windows now has WSL.

To have the ability to have Linux natively available on Windows is just perfect for my desktop machine.

I only develop using NeoVim + Tmux anyhow; so, I don’t need GUI or Windows interactions. I just need bash and proper screen redraw with 256 colors.
That’s it.

WSL and Linux User Mode RTM Release Date

It was suspiciously awkward that nothing made note of its availability; not from the keynote nor from Hanselman’s and MSDN’s introduction blog posts. All that was said was that the Windows 10 Insider Preview refresh released in January 2016 contained this new WSL platform, and that the bash tooling would be released for it soon. There was even a Windows Insider/dev that noticed the new WSL binaries/framework available back in January, before it was announced.

So a few of us kept poking and prodding at our MS resources, trying to get our hands on it.

It turns out that you have to take a few initiatives to get your system ready for UML. This experience has taught me the new way in which MS will be releasing features into Windows going forward.

Enough Already, How to Install It?

First, you can’t install it on your existing Windows 10. Not for some time, not until it is ready for public consumption. Currently Microsoft has said it will be part of the Anniversary build due out this summer.

This post is about getting access to the Insider Preview edition, before it is released.

Here’s the overview of what you need to do:

  • Download Windows Insider Preview 14295 (14316 ISO is not out as of the time this writing. But there is a Windows Update to upgrade to 14316).
  • Install it (recommended in a VM, as Previews usually expire).
  • Go straight to Start –> Settings –> Updates and Security.
  • Under “Update settings”, click Advanced options.
  • Under “Get Insider Preview Builds”, click “Fix me” or whatever may show here.

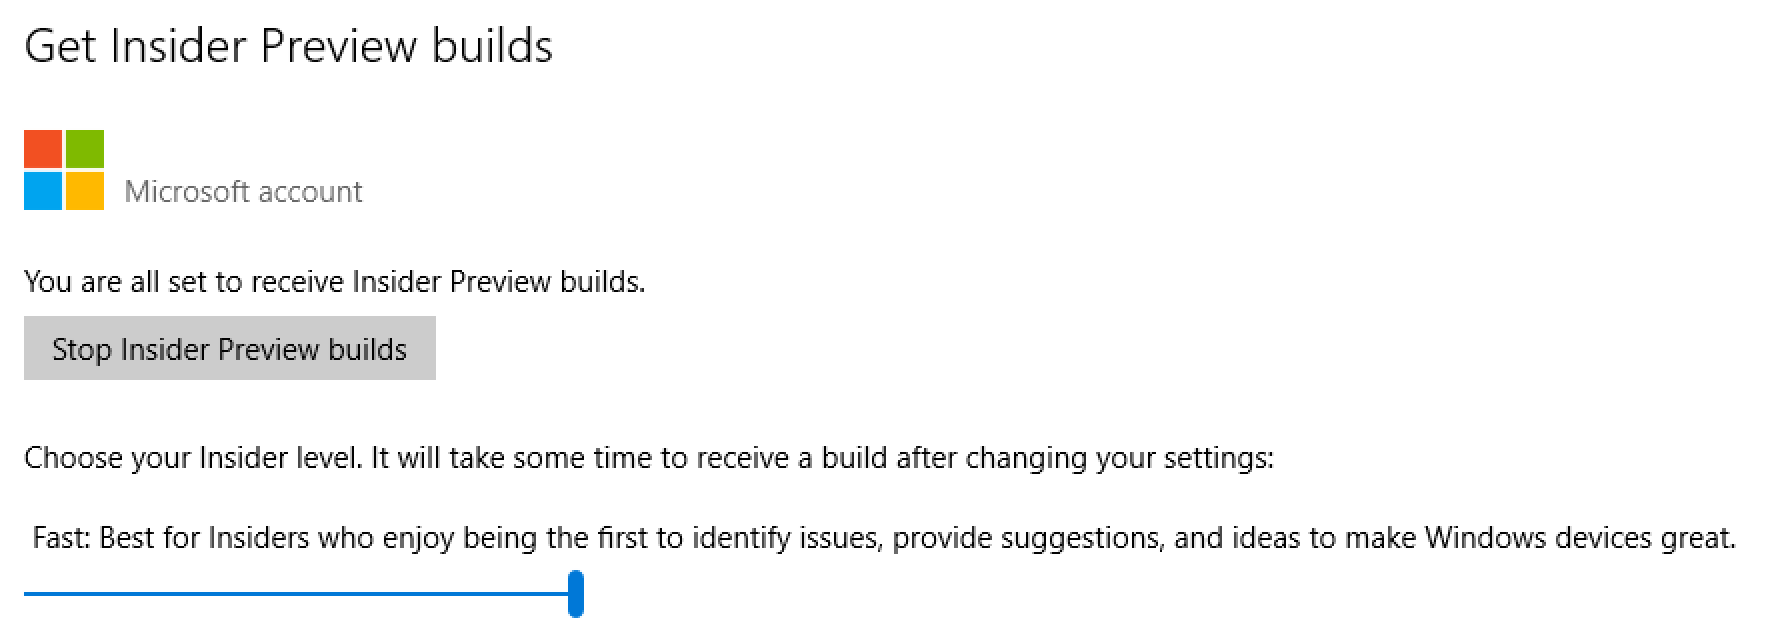
You should end up with a slider, asking you to Choose your insider level. Like this:

Windows Insider Preview slider level

Move it all the way to the right, for Fast.

The next series of mouse-contortions is to turn on Developer Mode.

  • Start –> Settings –> Update & security
  • On the left, click For developers
  • Select the option for Developer mode
  • Restart.

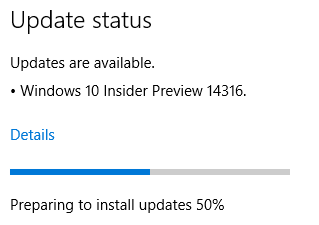
You should be able to run Windows Update and see that Windows 10 Insider Preview 14316 is available.

Windows 10 Insider Preview 14316 Update

Download and install. You may want to go make some tea.

Another set of mouse-ninja-moves is to add the Bash features:

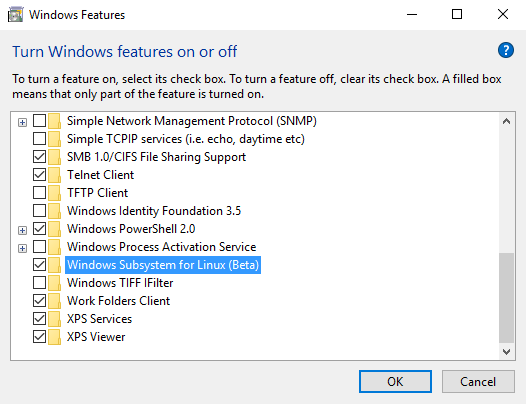
  • click Start and type “Windows Features” and choose “Turn Windows features on or off”
  • scroll down and enable “Windows Subsystem for Linux (Beta)”
  • Click OK and Restart.

Enabling Windows Subsystem for Linux

Install Bash on Ubuntu On Windows

If only we were done. We now need to download and install the Bash on Ubuntu on Windows desktop application, which currently seems to be done via a “bash” command line utility.

  • Launch Console (Start –> type “CMD” and press Enter)
  • Enter “bash” at the prompt and press “Enter”.
  • Follow the prompt to download and install Ubuntu 14.04 LTS ISO.
  • Once done, REBOOT (or at least I did).

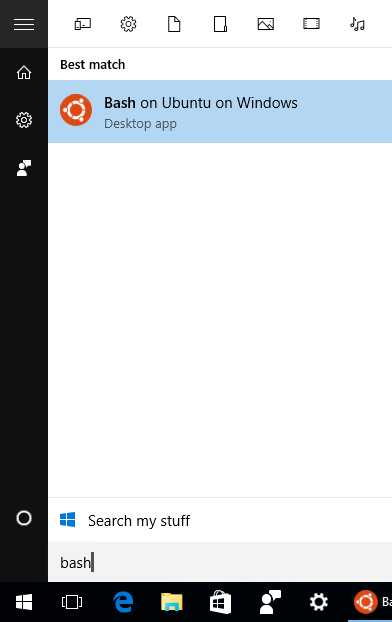
Once rebooted, you now have a new Desktop app you can launch called Bash on Ubuntu on Windows

Bash on Ubuntu on Windows desktop app

I thought once I hit “y” to install bash, I was in bash. It sure seemed like it but I had a few issues poking around. I went ahead and rebooted and noticed a new app was installed.

Quirky

A number of things weren’t working with my default installation. I’ll work on those and will update this post, or create another walk-through.

Stay tuned!

Leave a comment

Fix Slow Scrolling in VIM and Neovim

I am three months into my (4th) new development environment that I have bounced around over the last three decades. I finally put in the time to learn vim/neovim to get away from graphical IDEs and return back to shell development. With this brings a whole new timesuck of constantly tweaking your .vimrc to the never reaching goal of perfection.

Now that I have my plugins and environments setup, I recently enabled a setting to help me find my cursor faster in my .vimrc file.

set cursorline

I was warned in the vim documentation that “Will make screen redrawing slower.” Little did I know just how slow it would make it crawl! I first noticed it with neovim. To confirm it wasn’t neovim itself, I attempted to load vim with the same config and oh wow how horrible slow things scrolled. CPU usage of both neovim and vim spiked to 99% on OS X under iterm2 and tmux.

The issue is exasperated when you increase your keyboard’s key repeat and shorten the repeat delay. OS X is not fast enough for me; so, I have to use Karabiner’s Key Repeat feature to speed things up greatly (Delay @ 150ms, Key Repeat at 10ms is just right).

A few quick Google searches surfaced the issue: cursorline, and similar cursorcolumn was the issue when you have a plugin that highlights a bunch of text. Most people were having issues with Ruby’s code plugins.

I was using vim-go, and its highlighting, when I noticed the issue.

This Stackoverflow answer is, as the comments say, a lifesaver. Basically it outlines the very reason why scrolling is slow and how to debug exactly what regex pattern is causing it.

How to Debug Slow Scrolling in VIM

You can debug what is slowing things down by first enabling the vim option called syntime which is adequately defined as “When scrolling is slow.”

:syntime on

Then scroll up and down a lot, get it to bog down. I also recommend doing this within vim instead of neovim to really make things slow. After 10 seconds or so, generate a report with the following.

:syntime report

For me, here’s the top 10 results when a FileType of go was being scrolled:

TOTAL      COUNT  MATCH   SLOWEST     AVERAGE   NAME               PATTERN
2.482624   7066   0       0.009561    0.000351  goInterfaceDef     \(type\s\+\)\@<=\w\+\(\s\+interface\s\+{\)\@=
2.476090   7066   0       0.008820    0.000350  goStructDef        \(type\s\+\)\@<=\w\+\(\s\+struct\s\+{\)\@=
2.457858   7278   212     0.008375    0.000338  goFunction         \(func\s\+\)\@<=\w\+\((\)\@=
2.440439   7066   0       0.007554    0.000345  goFunction         \()\s\+\)\@<=\w\+\((\)\@=
0.757577   7180   114     0.001380    0.000106  goInterface        \(.\)\@<=\w\+\({\)\@=
0.745827   7104   38      0.001105    0.000105  goStruct           \(.\)\@<=\w\+\({\)\@=
0.640945   7064   0       0.004620    0.000091  goSpaceError       \(\(^\|[={(,;]\)\s*<-\)\@<=\s\+
0.223065   12827  5910    0.000239    0.000017  goMethod           \(\.\)\@<=\w\+\((\)\@=
0.071478   7064   0       0.000128    0.000010  goSpaceError       \(\(<-\)\@<!\<chan\>\)\@<=\s\+\(<-\)\@=
0.058679   7064   0       0.000100    0.000008  goSpaceError       \(\(\<chan\>\)\@<!<-\)\@<=\s\+\(\<chan\>\)\@=

Immediately you can see it is vim-go’s regex patterns that is slowing down the scrolling. Interesting how there were two goFunction regex patterns caught, and both are slow.

At first glance, there doesn’t seem to be any big issues with them. Just a lot of matching. Running the first one through regex101.com shows the following definition:

/\(type\s\+\)\@<=\w\+\(\s\+interface\s\+{\)\@=/
\( matches the character ( literally
type matches the characters type literally (case sensitive)
\s match any white space character [\r\n\t\f ]
\+ matches the character + literally
\) matches the character ) literally
\@ matches the character @ literally
<= matches the characters <= literally
\w match any word character [a-zA-Z0-9_]
\+ matches the character + literally
\( matches the character ( literally
\s match any white space character [\r\n\t\f ]
\+ matches the character + literally
interface matches the characters interface literally (case sensitive)
\s match any white space character [\r\n\t\f ]
\+ matches the character + literally
{ matches the character { literally
\) matches the character ) literally
\@ matches the character @ literally
= matches the character = literally

That is a lot of matching in a single regex! Perhaps vim’s regex interrupter is just that bad. I notice a significant speedup when using Neovim over Vim; but, it is still very slow.

The Fix for Slow Scrolling in VIM

Now, I could spend some time debugging this regex, inserting conditionals and groupings in an attempt to limit the amount of matching which should in theory speed that up. But I need to get some work done.

One could just toggle off cursorline when it is slow and move on and toggle it back on with the same command later. Set it to a mapped key to make it faster.

:set cursorline!

An option that I found in the help that does speed things up is lazyredraw.
Though, it is tolerable with Neovim, vim was still a little bit choppy. I have this enabled as default in my .vimrc regardless.

:set lazyredraw

Some people have gotten success by disabling syntax highlighting after 128 columns and/or minlines set to 256. Neither worked for my environment though.

set synmaxcol=128
syntax sync minlines=256

Personally, I just disabled some of (but not all of) vim-go’s syntax highlighting because I visually value the cursorline highlighting more than syntax highlight. Besides, Rob Pike calls syntax highlighting juvenile.

This option is very plugin specific; so, your mileage will vary of rather your vim plugin supports selective disabling of syntax highlighting.

For vim-go, they have highlighting disabled by default and you must explicitly enable it. To disable syntax highlighting, just remove what you did to enable it in the first place in your .vimrc:

1
2
3
4
5
6
7
8
9
10
11
12
13
14
15
16
17
18
19
20
21
22
23
24
25
26
27
28
29
30
31
32
33
34
35
36
function! VimGoSetup()
  " vim-go related mappings
  au FileType go nmap <Leader>r <Plug>(go-run)
  au FileType go nmap <Leader>b <Plug>(go-build)
  au FileType go nmap <Leader>t <Plug>(go-test)
  au FileType go nmap <Leader>i <Plug>(go-info)
  au FileType go nmap <Leader>s <Plug>(go-implements)
  au FileType go nmap <Leader>c <Plug>(go-coverage)
  au FileType go nmap <Leader>e <Plug>(go-rename)
  au FileType go nmap <Leader>gi <Plug>(go-imports)
  au FileType go nmap <Leader>gI <Plug>(go-install)
  au FileType go nmap <Leader>gd <Plug>(go-doc)
  au FileType go nmap <Leader>gv <Plug>(go-doc-vertical)
  au FileType go nmap <Leader>gb <Plug>(go-doc-browser)
  au FileType go nmap <Leader>ds <Plug>(go-def-split)
  au FileType go nmap <Leader>dv <Plug>(go-def-vertical)
  au FileType go nmap <Leader>dt <Plug>(go-def-tab)
  let g:go_auto_type_info = 1
  let g:go_fmt_command = "gofmt"
  let g:go_fmt_experimental = 1
  let g:go_dispatch_enabled = 0 " vim-dispatch needed
  let g:go_metalinter_autosave = 1
  let g:go_metalinter_autosave_enabled = ['vet', 'golint']
  let g:go_metalinter_enabled = ['vet', 'golint', 'errcheck']
  let g:go_term_enabled = 0
  let g:go_term_mode = "vertical"
" let g:go_highlight_functions = 1
  let g:go_highlight_methods = 1
" let g:go_highlight_structs = 1
" let g:go_highlight_interfaces = 1
  let g:go_highlight_operators = 1
  let g:go_highlight_extra_types = 1
  let g:go_highlight_build_constraints = 1
  let g:go_highlight_chan_whitespace_error = 1
endfunction
call VimGoSetup()

You can see the three lines I commented out above. I still get plenty of syntax highlighting without it. So I’m good with this for now.

Finally, one could just use more of PageUp/PageDown to move around the file.

Leave a comment

Google Authenticator’s Databases: Copy, Move and Fix

"Google Authenticator"

Google Authenticator is a two-factor application that runs on your mobile or tablet device. Typically you only run it on one device because the secrets you store in its databases cannot be shared between devices.

In this post, I explain some technical details about this database and how you can exploit the details for your gain (from an Android’s perspective).

Factor Resets

So when an Android update comes out, I can not update. I am forced to backup my configurations first, upgrade the device and then restore my configurations after the apps are reloaded. The reason I have to do this is because I run a custom bootloader. I also encrypt my device which further mandates a factor reset upon unlocking and locking to regain root access. What a PITA.

But these annoyances have afforded me the luxury of learning more details about the apps and system processes, along with their configurations.

I use custom bootloaders to gain access to the device in the event of a MMC failure (has happened once, I was able to get important data off of it before it totally was lost).

Encryption is used because, well, I’m just paranoid like that.

Google’s Warning: Stay away from GA’s Databases!

Google has stated (insert ref here) that you should not be copying your Google Authenticator’s databases from device to device. This is true as it could lead to you leaking your secrets by, say, copying the file to your cloud storage to sync to another device.

Not only have you given your cloud provider access to your secrets (that is now backed up and replicated on their systems); but, if hackers gain access to your cloud platform (which several have Undelete options!), that’s game over man.

Me? I always copy directly from my device to a USB stick. Do my thing on the device and when ready, push it back from the USB stick to my device. When done, wipe the USB stick (or write an ISO to it, which I do very very often).

Why Even Bother?

So why do I go to such extremes? Google’s very own security supplies a way for you to move your secret (a new secret) to a new device, a process I consider the absolute model of perfection of moving your secrets.

One answer: 17.

I have 17 Google Authenticator “secrets” on my device for 17 services across my personal services and several clients’ access.

Have you ever tried to regain access to an account once you lost your two-factor authentication secret? I have. I have a 2:5 win/loss ratio when I had to play that game. No more.

So, it’s time to hack this thing to take matters into my own hands.

This, ladies and gentlemen, is why I own Android…

Google Authenticator’s Database

If you got Root, then you have more options.

On Android, the Google Authenticator databases file is located at:

1
/data/data/com.google.android.apps.authenticator2/databases/

Within this directory is a ‘databases’ file:

1
2
root@hammerhead:/data/data/com.google.android.apps.authenticator2/databases # ls -l
-rwxrw-rw- u0_a92     u0_a92        16384 2015-06-22 19:17 databases

And no, that’s not a misprint. There is a directory called databases with a file in it called databases.

Permissions

The first dumbfounded thing I found during my first attempt at copying my second version of GA’s databases is the permissions. Take a look closely at the ls command above. Notice anything?

1
2
3
4
5
6
7
8
-rwx------
World: Read/Write/Execute

----rw----
Group: Read/Write

-------rw-
User: Read/Write

WTF? Everyone has access to this file?

During my first restore, I had Google Authenticator constantly crashing on launch. Come to find out, it did not like my 700 permissions access I first gave it. Only after frustration of the app crashing over and over did I just give it full 777 permissions… And the app opened without a crash? It needs world read/write?

I then found out the parent databases directly itself needed the same permissions.

Now, I know that Android has some special user-space for each app to isolate each app’s access to the rest of the file system. Perhaps it’s enough to trust Android in that its app isolation is good enough.

I don’t trust anyone with this data; but, unfortunately if you want GA running you have to set the correct permissions at this time:

1
2
3
4
5
6
# NOTE: You will need to be "su" root user to run these

cd /data/data/com.google.android.apps.authenticator2/
chmod 766 databases
cd databases/
chmod 766 databases

The parent databases/ folder, and the databases file itself requires world read and write access – or the Google Authenticator’s app won’t even open (crashes).

Ownership

In addition, and what stemmed me to write this post, is I had another issue. I was not able to add any new entries to my Google Authenticator. I had the permissions right, so I thought.

Upon inspection, I could see that the directories surrounding the databases/ directory was owned by a different user. In my case, that userid was u0_a92.

I am not sure if this was the user space dedicated to this app or not. But in any case, once I set the owner and group to this user, I was able to add new entries:

1
2
3
4
5
6
7
# NOTE: you will need to be "su" root user to run these
# NOTE 2: perform an "ls -l" like I did above and change u0_a92 to match.

cd /data/data/com.google.android.apps.authenticator2/
chown u0_a92:u0_a92 databases
cd databases
chown u0_a92:u0_a92 databases

And now I was able to add new entries.

Inspecting the Database

The databases file itself is a sqlite database. This makes it easy to write an application to look at the database and query directly against it.

1
2
3
4
5
6
7
$ sqlite3 ./databases
SQLite version 3.8.11.1 2015-07-29 20:00:57
Enter ".help" for usage hints.
sqlite> .fullschema
CREATE TABLE android_metadata (locale TEXT);
CREATE TABLE accounts (_id INTEGER PRIMARY KEY, email TEXT NOT NULL, secret TEXT NOT NULL, counter INTEGER DEFAULT 0, type INTEGER, provider INTEGER DEFAULT 0, issuer TEXT DEFAULT NULL, original_name TEXT DEFAULT NULL);
/* No STAT tables available */

Here above we can see two tables in this file. An android_metadata table and an accounts table.

Run this command:

1
sqlite> SELECT * FROM accounts;

Did you notice everything is in the clear here? No encryption?

It was so much so that I started to copy and paste my output of 17 accounts; but, it was too much to redact. I figured I’ll just posted the schema above and let you query your own database.

Takeaways

There a few things to take away from all of this.

Google Authenticator has world read/write permissions: Is that a security issue?

Google Authenticator stores everything in the clear in Sqlite: Is that a security issue?

I am going to reach out to Google for comment about this one. But for now, you have the details and know-how to move this file as you see fit. No more having to reset 17+ accounts, just for an Android update!

Leave a comment

Processing Credit Cards With Tokens?

Heard this on NPR and decided to investigate further because at first glance it looks like a good idea – at least from a developer’s perspective.

From the PaymentNews website, I found this announcement.

Tokenization is the process of replacing a traditional card account number with a unique payment token that is restricted in how it can be used with a specific device, merchant, transaction type or channel. When using tokenization, merchants and digital wallet operators do not need to store card account numbers; instead they are able to store payment tokens that can only be used for their designated purpose. The tokenization process happens in the background in a manner that is expected to be invisible to the consumer.

Visa calls it, VISA checkout and it is supposed to remove the burden of entering a credit card from your smartpohone.

Looking better. But wait a minute, how do you secure/access a token?

Turns out they are expecting users to sign in with a “simple username and password, easy to remember.” And there inlies my first cringe – passwords? Let me explain why that is a roadblock IMO:

  • Either the password requirements will be a road block for anyone to easily type or remember.
  • Or, the password will be a weaker password – easy for people to remember, and also to reuse for, say, a forum login that can easily get sniffed.

Sure, you can mitigate the complex passwords with a password manager. But, not everyone uses those and some would argue a password manager is also a bad idea.

Today if presented with an “enter credit card details below” with an option to “sign in with Visa Checkout instead”, I still enter the raw CC details. Which that in and of itself is the problem VISA is trying to fix by focusing the burden on secure storage of those CC details with VISA themselves, instead of the mom-n-pop cake shop’s PHP website that is asking for my CC.

What I would suggest is to take a more two-factor approach to authentication. Something that involves a simple password, one that is easy to remember; but also, you need to have a second factor of authentication – like a keyfob or fingerprint reader or possibly even, gasp, something as simple as Google’s Authenticator that has worked perfectly for me for many websites and devices.

But sadly, we will continue to be forced to obey the false sense of security of complex passwords.

Also see: Passwords – When Security Gets in the Way

Leave a comment

FCC Crashed Again for Net Neutrality

A flood of comments about net neutrality crashed the Federal Communications Commission’s commenting site on Tuesday, the original deadline for public comments on the controversial Internet proposal. But the tech problems are buying those who want to weigh in some extra time — the deadline for public commenting is now Friday (July 18th, 2014) at midnight.

Thank you everyone for answering my call to crash the FCC.

Well, at least I’d like to think I had a hand in it with my awesome blog posts on the matter. :)

Leave a comment

Password Managers Are Not Immune to Hacks Themselves

Hacking Password Managers

“Our attacks are severe: in four out of the five password managers we studied (LastPass, RoboForm, My1login, PasswordBox, and NeedMyPassword), an attacker can learn a user’s credentials for arbitrary websites. We find vulnerabilities in diverse features like one-time passwords, bookmarklets, and shared passwords. The root-causes of the vulnerabilities are also diverse: ranging from logic and authorization mistakes to misunderstandings about the web security model, in addition to the typical vulnerabilities like CSRF and XSS. Our study suggests that it remains to be a challenge for the password managers to be secure.”

“We found critical vulnerabilities in all three bookmarklets we studied,” the researchers report. “If a user clicks on the bookmarklet on an attacker’s site, the attacker, in all three cases, learns credentials for arbitrary websites.”

“Our work is a wake-up call for developers of web-based password managers. The wide spectrum of discovered vulnerabilities, however, makes a single solution unlikely. Instead, we believe developing a secure web-based password manager entails a systematic, defense-in-depth approach… Future work includes creating tools to automatically identify such vulnerabilities and developing a principled, secure-by-construction password manager.”

I can’t believe we are still talking about CSRF attacks. And for websites claiming to be secured for passwords themselves? Isn’t it a common job interview question by now (or better yet, a coding exercise) for developers in how to prevent CSRF attacks?

Oh yeah, and how most of the common web-based password managers are all hackable. Sure, they fixed THIS vulnerability. Then when the next zero-day is found, it will be fixed. And the next and the next.

I use a password manager. It is not web based, does not integrate into any browser, and still requires manual intervention to open and view – with copy-n-paste only possible in some circumstances which makes the annoyance ever more livable after reading this article.

Can’t wait until next month (August) for the paper to be released.

Leave a comment

Passwords - When Security Gets in the Way

When Security Gets in the Way

The numerous incidents of defeating security measures prompts my cynical slogan: The more secure you make something, the less secure it becomes. Why? Because when security gets in the way, sensible, well-meaning, dedicated people develop hacks and workarounds that defeat the security. Hence the prevalence of doors propped open by bricks and wastebaskets, of passwords pasted on the fronts of monitors or hidden under the keyboard or in the drawer, of home keys hidden under the mat or above the doorframe or under fake rocks that can be purchased for this purpose.

We are being sent a mixed message: on the one hand, we are continually forced to use arbitrary security procedures. On the other hand, even the professionals ignore many of them. How is the ordinary person to know which ones matter and which don’t? The confusion has unexpected negative side-effects. I once discovered a computer system that was missing essential security patches. When I queried the computer’s user, I discovered that the continual warning against clicking on links or agreeing to requests from pop-up windows had been too effective. This user was so frightened of unwittingly agreeing to install all those nasty things from “out there” that all requests were denied, even the ones for essential security patches. On reflection, this is sensible behavior: It is very difficult to distinguish the legitimate from the illegitimate. Even experts slip up, as the confessions reported occasionally in various computer digests I attest.

I recall many years ago when Microsoft proclaimed the end of password management woes with long and memorial Pass Phrases. I personally started to really get annoyed at websites that didn’t allow me to enter spaces or the password length was something small like 16 characters.

As a previous IT Administrator, having to reset so many user passwords because they locked themselves out or just plain forgot their had-to-change-ever-60-days password, I saw first hand the annoyances that most had with passwords.

It wasn’t until just a few years ago that the buzz around complex passwords started to shift to a “false sense of security” statue. Which is very true because I have personally brute-force attacked several passwords (in the name of education, of course).

Seeing how fast my X79 6-core desktop with over 5,760 GPU cores could churn through a few billion password combinations to guess a 20 character TruCrypt volume (it took only 4 hours by the way), the era of complex passwords deterring hackers is over – way way over since this hardware can easily be purchased off the shelf by anyone – and I still have room for another 6000 GPU cores if I ever upgraded. That’s just insane – 12,000 GPU cores in a single machine.

Smart Password Hashing

Now, some password managers are smart. It wasn’t until I read into KeePass’ protection against Dictionary Attacks did I realize a whole ‘nother way of preventing brute-force attacks. KeePass describes their password hashing like this:

You can’t really prevent these [brute-force dictionary] attacks: nothing prevents an attacker to just try all possible keys and look if the database decrypts. But what we can do (and KeePass does) is to make it harder: by adding a constant work factor to the key initialization, we can make them as hard as we want.

Please go read the rest of that quote for extreme details. But in short, here is what they do:

  • Take your Master password and hash it.
  • Hash it another N number of times based on a simple pre-determined algorithm (think: PreviousHash + “A Salt”, PreviousHash + “B Salt”, etc).

The trick that makes this work is that N should be a number of cycles that it takes your computer to compute in about 1 second. By default, they set it to 6000 to allow for older mobile phones to be able to open the password database within about a second or two. But this should be much higher. Like, on a factor of 100,000 times higher.

For example, that same 6-core X79 CPU and 5,760 GPU core desktop I used to crack that 20-character TruCrypt could generate about 18,000,000 passwords each second. But, when I opened KeePass and told it to calculate how many hashes it needed to perform to take at least 1 second on this machine, the answer was 23,000,000.

So how does rehashing 23,000,000 times work, you may ask? Instead of my computer generating 23,000,000 passwords a second in a brute-force attack, it follows a pre-determined algorithm hashing 23,000,000 times to generate only 1 password.

I’ll let that sink in for a moment…

If a hackers machine is busy generating only 1 password per second, the possibility of brute force attacking a database goes from 23,000,000 per second down to just 1 per second.

No hacker in the world is going to continue brute-forcing that database. Most likely they will just look for the NSA backdoors available in everything at that point.

I’ll end with a final quote from our buddy Don from earlier.

Although there is much emphasis on passwords security most break-ins occur through other means. How do thieves break into systems? They usually don’t use brute force. They phish, luring unsuspecting but helpful people to tell them their login name and password. Or they install sniffers on keyboards and record everything that was typed. The strength of passwords is irrelevant if the thief has already discovered it.

Leave a comment

Google Nexus 10 and Apple Wireless Keyboard

I have been fighting an ongoing battle with Apple’s Wireless Keyboards and a tablet of mine, the Google Nexus 10. While the keyboard works with all other Android and Apple devices we have (Nexus 5, Nexus 7 2013, Galaxy Nexus and Apple iPod Touch), it does not work with the Google Nexus 10. I’ve gone as far as to asking for help on SE.

Well, that’s not entirely accurate. The story started with a used Apple Wireless Keyboard I got from eBay. It paired and worked fine; but, some of the keys did not work. So I bought a new one from Apple.com.

It paired and connected just fine; but, the brand spanking new keyboard did not work. The Nexus 10 would not recognize an additional input device (the small “A” symbol in the top left corner of the screen).

To reiterate, this new Apple Wireless Keyboard ordered direct from Apple.com worked fine with all other Android devices (Android 4.2.2, 4.4.2, 4.4.3 and 4.4.4) and the iPod Touch 4th Gen. It is only this Nexus 10 (Android 4.4.3 and 4.4.4) that it did not.

Nexus 10 Bluetooth Stack

As I blogged some time ago, not all Bluetooth devices are made equal. Devices implement the Bluetooth stack differently and sometimes miss an implementation detail.

I highly suspect the Nexus 10 has a flawed Bluetooth implementation, causing this incompatibility.

But what exactly is it incompatible with? It worked fine with the previous Apple keyboard I got used on eBay. It works fine with all other bluetooth keyboards I have tried.

Why this one Apple keyboard I got direct from apple.com?

Apple Wireless Keyboard version: 2007, 2009 and 2011

Atlas only after several trips to some local Apple stores did I stumble onto the issue: there are three versions of the Apple Wireless Keyboard that were sold. I found this out by looking at about a dozen different iMacs they had, from old to new. Surprisingly Apple’s newest store located in NYC, in Grand Central Terminal, is the one that had the largest collection of older iMacs – ones that actually had the 2009 keyboard and even one with the 2007 keyboard.

They are identified by their model years. To take a quote directly from Apple’s support site:

* Apple Wireless Keyboard (2011): Features an aluminum case and uses two AA batteries. You can identify this model by the following icons on the F3 and F4 keys:

* Apple Wireless Keyboard (2009): Features an aluminum case and uses two AA batteries. You can identify this model by the following icons on the F3 and F4 keys:

* Apple Wireless Keyboard (2007): Features an aluminum case and uses three AA batteries.

So, we have three keyboards available to us. After many trials and errors, I can safely say…

Get the 2009 Apple Wireless Keyboard model

The used eBay model I got was a 2009 and it worked fine, dispite a few keys not working. The Apple.com model I got was an 2011 with the latest x80 firmware – and it did not work.

You want to focus on the F3 and F4 keys looking like this:

Again, the 2011 keyboard works fine with all other Android devices, even back to Android 4.2 on my Galaxy Nexus. So this is clearly a fault with the Nexus 10’s bluetooth hardware.

But none the less, if you want an Apple Wireless Keyboard to work with your Nexus 10, you better seek out the 2009 model.

2009 Apple Wireless Keyboard Firmware

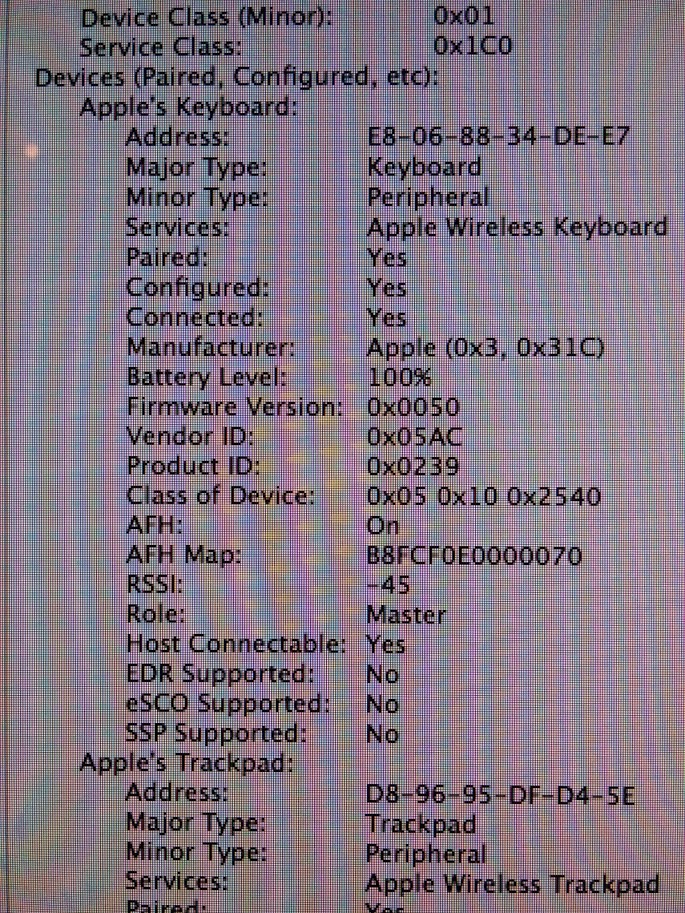
And btw, the firmware version of the 2009 I found working at an Apple store has firmware version x50. You can see it under the system’s properties, like this:

I only mention the firmware because I found a number of posts online where people upgraded their 2009 and 2011 keyboard firmwares to the latest, and lost some functionality. I am not sure if the x50 version of the firmware is the latest. I am only stating the exact version of the 2009 keyboard that worked flawlessly with the Nexus 10.

Leave a comment

Only 2 Days Left to Crash the FCC

John Oliver Helps Rally 45,000 Net Neutrality Comments To FCC

There’s only two days left for comments. At the time I left mine a month ago, there were 65,000 comments. Now, there are 205,000.

The url to file your comments: fcc.gov/comments

The YouTube video hit on every point I’ve been saying in person when talking about this, and many more.

One of my biggest I tell people is how the former chairman of the FCC left (forced out?), and the new one put in place by Obama last year previously ran (as in chaired and commanded) the lobbying firm for Cable and Wireless (e.g. Comcast and TimeWarner) which was directly responsible for the last attempt to create the two-tier system that the FCC blocked. And, that sued the government to force this actual change.

Translation by the current FCC chairman: “We didn’t win last time. Ok, let’s sue the FCC/government to force a rule change. When we win the lawsuit, I’ll step down as head of this lobbyist group and become head of the FCC [so I can force this rule through].”

How fracked up is that?

Also it sucks that NetFlix already has to pay Comcast to get service to its users.

Leave a comment