Please note that this post was migrated to my new blog platform. There may be bad formating, broken links, images, downloads and so on. If you need an item on this page, please contact me and I will do my best to get it from my backups.
Upon installing your SSL certificate purchased through GoDaddy, and your Firefox users get prompted with a certificate warning of “Unauthorized Authority”, read on for a fix using Windows 2003 Server (and R2). This also works for any other authority that is not authorized by default in any browser. In this article, I provide links to GoDaddy’s Intermediate Certificates. If you obtained your SSL certificate through another party, ask them for their “Intermediate Certificates” to download for IIS.
Overview
SSL certificates are commonly known to secure a channel of communications, such as the web and email. The problem when installing GoDaddy SSL certificates on a server is Firefox may prompt you stating that the certificate is from an “Unauthorized Authority”.
Why is GoDaddy an unauthorized authority on SSL certificates? Bloggit has a good definition over on his blog, as well as a resolution for stunnel and apache systems. But, we are using IIS so things change a bit for us. The bottom-line is a simple quote from his blog post:
In practice, while Opera and Internet Explorer come [installed] knowing about GoDaddy [as an authorized authority], Firefox and Thunderbird do not. And therefore presumably several other devices also don’t. They gripe that GoDaddy is an “Unknown Authority”… rather than silently accepting it.
To better describe what is happening, think of how an SSL certificate gets authorized by your browser. I am going to take a stab on how I think it works (feel free to correct me in the comments). The browser receives the header information for the SSL certificate upon the first communication to the web server. Within the header of this request is the complete information and public key of the SSL certificate information. But also included in the SSL certificate header information is the reference chain of the issuer, which is GoDaddy (or whomever issued your SSL certificate). If the client’s browser does not have GoDaddy listed as a known and authorized issuer of SSL certificates (i.e. Firefox and Thunderbird do not, but IE7 does), the browser will prompt the user of the Unknown Authority. So the fix is to add a known issuer of SSL certificates that is “linked” to GoDaddy’s (better known as Intermediate Certificates) at the server level.
Resolution
The fix is to get GoDaddy added to the list of companies that are authorized to issue SSL certificate. And, this is performed on the web server serving up your custom SSL certificate. We will need to add the GoDaddy company to the reference chain of authorized issuers of SSL certificates.
Basically we want to say, “GoDaddy is known as a child of the bigger company Starfield”. Starfield is GoDaddy’s parent company and is in Firefox and Thunderbird’s list of authorized authorities.
And just like SSL certificates that must be issued by GoDaddy to be authorized, Starfield must issue a similar certificate that describes GoDaddy as a known authorized authority of SSL certificates.
I am going to list the steps first outlined by Doug Hughes, with some modifications and pictures. Below are the set of instructions to get your new GoDaddy SSL certificate installed first. We will tackle the Starfield GoDaddy Intermediate Certificate later.
- Copy your GoDaddy certificate into a file named domainname.cer on your web server. The name is arbitrary, but let it end in .cer for simplicity.
- Click Start -> Run and type mmc and press Enter. This opens the Microsoft Management Console.
- Click File -> Add Remove Snap-In.
- Click Add to open the Add Standalone Snap-In Window
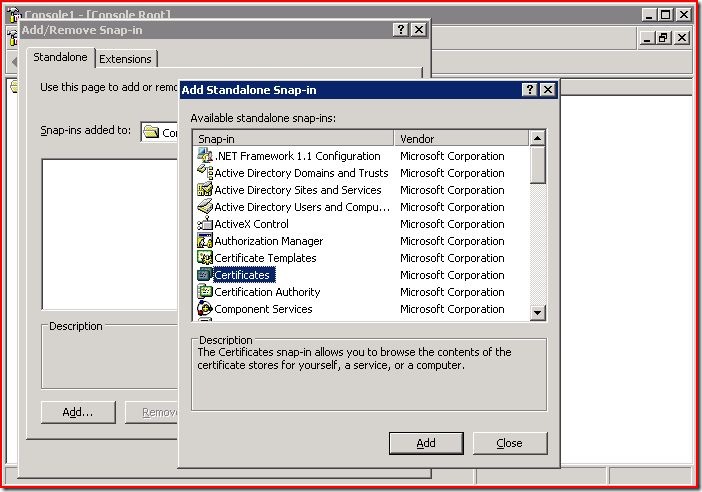
- Scroll to find the Certificates snap-in as shown below. Select it and click Add.
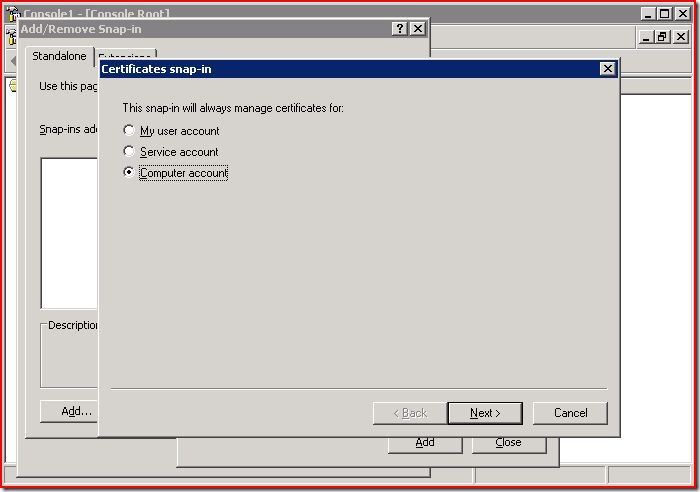
- In the corresponding wizard, select Computer account and click Next.
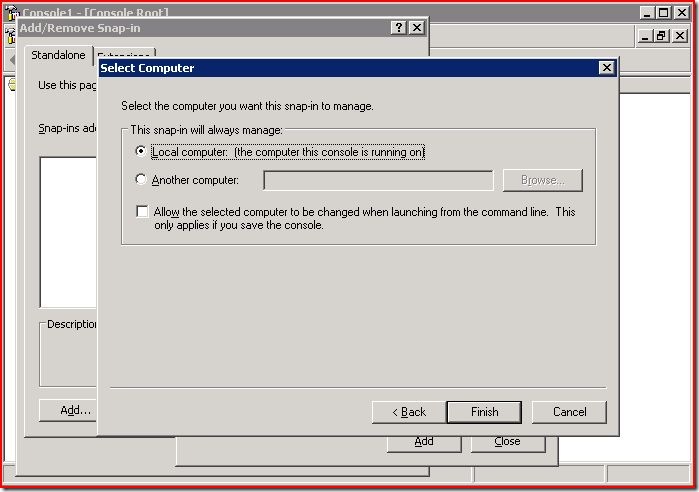
- Select Local computer and click Finish.
- Click Close and then Ok. Now you will see the Certificates snap-in in the MMC.
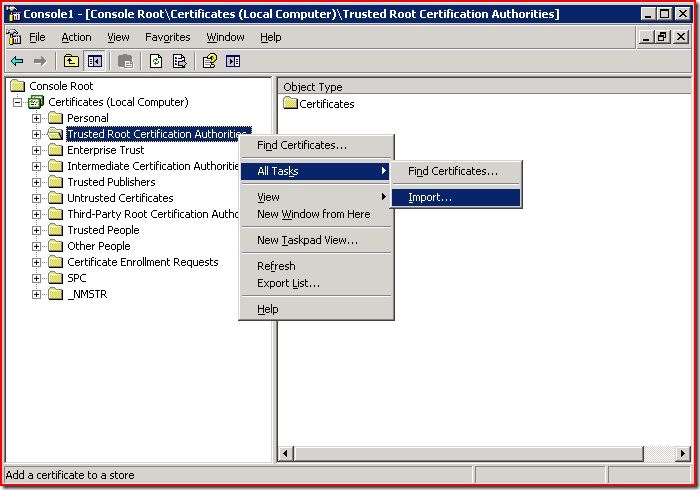
- Expand the Certificates node, right-click on Trusted Root Certification Authorities and select All Tasks -> Import as shown below.
- Click Next and then select the domainname.cer you created in step 1 above.
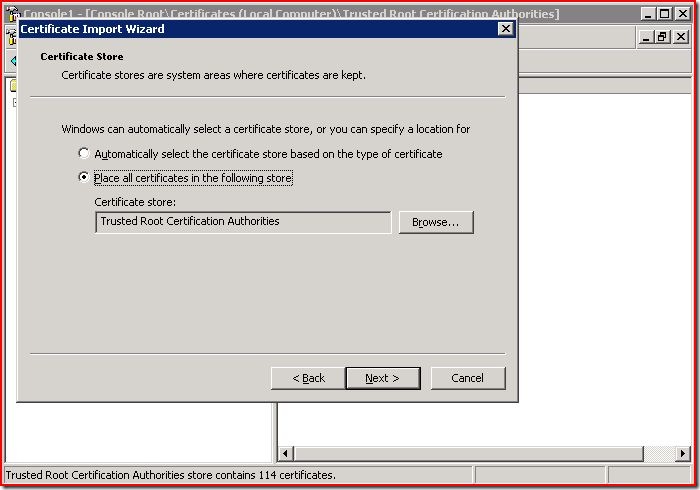
- The next step in the wizard should indicate that the certificates will be placed in the Trusted Root Certification Authorities. If it does not, you will need to select it by clicking Browse… Once it looks like the below, click Next.
- Click Finish on the final page. You should be prompted with a dialog that states the import was successful.
- Finally, you will need to stop and restart the website that the SSL certificate belongs to for the changes to take affect.
Final Procedure to install the Intermediate Certificate authority
Unfortunately, you are not done. The above only installs the GoDaddy certificate in the root trusted root certificates. The client’s browser will not authorize it just yet. To finish the process, you will need to install GoDaddy’s Starfield version of their Intermediate Certificate. Here is the all important link to go download it:
https://certs.godaddy.com/Repository.go
If you obtained your SSL certificate through another party, such as the discounted VeriSign type, you will need to obtain the Intermediate Certificate from your provider. But the steps are identical to resolve.
There are a number of certificates available in the link above. So for simplicity, I downloaded the bundled package that includes all of them named Go Daddy PKCS7 Certificate Intermediates Bundle (for Windows IIS).
Note: Take a special notice that this will download a file with the extension of .p7b.
The final step is to get the bundle of certificates installed. You do this by following exactly the steps I outlined above, 1 through 13 all over again. Except on step 10, you will need to filter the Files of type drop-down as shown below.
Note: You only need to perform this process once per server, as it will be installed at the root level of all certificates for the server. So any further GoDaddy SSL certificates installed will pickup the Starfield SSL certificate as the parent company of GoDaddy.
Step 10 change:

This will now let you browse to the gd_iis_intermediates.p7b file you downloaded from GoDaddy. Follow the rest of the steps exactly.
Final thoughts
That is it. Make sure to stop and restart the web site that your new SSL is to take effect on. Or you can do an IISRESET to force an update to all websites.